Are you tired of wrestling with WordPress and its endless plugins? Is maintaining your website becoming more of a chore than a joy? It’s time to consider migrating from WordPress to Webflow, a powerful and user-friendly platform that offers design flexibility, built-in SEO tools, and zero maintenance. In this blog post, we’ll guide you through the process of migrating your WordPress site to Webflow, ensuring a smooth “WordPress to Webflow” transition and an upgraded website experience.
Key Takeaways
- Migrate from WordPress to Webflow for design flexibility, ease of use and integrated SEO tools.
- Prepare for migration by backing up your website, benchmarking performance & selecting a plan.
- Transfer content into Webflow CMS, customize the site with plugins/extensions & update DNS settings to launch your new website.
Why Migrate from WordPress to Webflow?

Migrating from a WordPress site to Webflow offers numerous advantages, such as:
- Design flexibility
- Ease of use
- Integrated SEO tools
- No maintenance requirements
Transitioning from a WordPress site with plugins to Webflow allows you to focus on creating visually appealing and professional-looking websites without the need for extensive coding knowledge or reliance on third-party plugins.
Let’s unpack these advantages for a clearer perspective.
Design Flexibility
Webflow provides greater design flexibility than WordPress, enabling the creation of unique and professional-looking websites. Whether you need a simple blog or a complex ecommerce website, Webflow’s powerful visual builder allows you to create a custom design that reflects your brand identity without being restricted by preset templates or themes.
With Webflow, even those with limited coding knowledge can design visually stunning websites that cater to their specific needs, making web development more accessible.
Ease of Use

Webflow’s user-friendly interface and visual builder make it particularly suitable for those who are just starting out with website building. Unlike WordPress, which often requires a steep learning curve to navigate its extensive features and plugins, Webflow offers an intuitive design interface that is easily accessible to both beginners and design-focused users.
Therefore, you can concentrate on crafting an engaging and visually appealing website, free from the complexities of technical details or intricate plugins, while easily managing data in xml format.
Thinking about making the switch? Migrating from WordPress to Webflow can dramatically improve your site’s performance, security, and scalability. See how our expert-led migration process can future-proof your business.
Built-in SEO Tools
One of the major advantages of using Webflow over WordPress is its built-in SEO tools. Webflow provides a range of SEO tools, such as meta tags, sitemaps, and canonical URLs, which help optimize website visibility and performance.
Hence, there’s no need to rely on third-party plugins or spend time manually adjusting settings to enhance your search engine rankings. With Webflow, your website is already built with SEO in mind, ensuring that your content is easily discoverable by search engines and users alike.
Zero Maintenance
In contrast to WordPress, which requires regular maintenance such as security updates, plugin updates, and server management, Webflow provides a zero maintenance solution for website owners, including web hosting. This allows you to focus solely on creating and managing your website content with an efficient content management system, without worrying about potential vulnerabilities or technical issues.
Webflow lets you enjoy a hassle-free webflow website experience with Webflow pages, freeing up more time to expand your online presence.
Preparing for the Migration

Before diving into the migration process, it’s important to prepare your WordPress website for the transition. Let’s go over some vital steps you must follow:
- Backing up your WordPress website
- Benchmarking its performance
- Choosing a Webflow plan that meets your needs.
Backup Your WordPress Website
Creating a backup of your basic WordPress site is a crucial step to ensure that no content is lost during the migration process. There are various tools and plugins available to help you create a backup of your WordPress website, including popular options like UpdraftPlus and VaultPress, which can be accessed through your WordPress admin dashboard. These tools are especially useful for managing backups of multiple WordPress sites.
A website backup serves as a safety net, ready to restore your site to its former state if any migration issues arise.
Benchmark Your Current Website Performance
Benchmarking your current website performance prior to migrating to Webflow is key, as this will allow you to compare growth and improvements after the migration. Use tools such as Google PageSpeed Insights, GTmetrix, and WebPageTest to analyze your website’s performance, including page load times, user engagement, and overall functionality.
This data will serve as a valuable reference point to help you optimize your new Webflow site and track progress post-migration.
Choose a Webflow Plan
Selecting a Webflow plan that aligns with your needs will contribute to a seamless migration process. Webflow offers a range of plans, including:
- Standard
- Plus
- Advanced
- Business
- Enterprise
These hosting provider plans cater to different website dimensions and budgets.
Start by evaluating the necessary features, such as the number of pages, storage space, and ecommerce functionality, to determine which Webflow plan best suits your requirements. Keep in mind that you can always upgrade or downgrade your plan as your website grows and evolves.
Transferring Content from WordPress to Webflow

Now that you’ve prepared your WordPress website for migration, it’s time to transfer your content to Webflow. Let’s walk through the process of exporting posts and pages from WordPress, importing content into Webflow CMS, and mapping fields and importing images.
Export Posts and Pages
To begin the content transfer process, you’ll need to export posts and pages from your WordPress website. You can do this using a plugin like WP All Export or by exporting your content in CSV format.
This will generate a file containing all of your website’s posts, pages, and media, which can then be imported into Webflow.
Import Content into Webflow CMS
Once you have exported your content from WordPress, it’s time to import it into Webflow CMS. Webflow provides an import tool in the Webflow dashboard, which makes it easy to upload the CSV file containing your WordPress content.
Follow the on-screen instructions to map your content fields to the appropriate Webflow CMS fields, ensuring that your content is accurately transferred and displayed on your new Webflow site.
Map Fields and Import Images
The final step in transferring your content from WordPress to Webflow is to map fields from the exported content to the Webflow CMS and manually import images to prevent display issues. This process ensures that your content is accurately displayed on your new Webflow site, with all images and media properly linked and functioning.
Once you have mapped fields and imported images, you’re ready to proceed with setting up 301 redirects and customizing your Webflow site.
Setting Up 301 Redirects
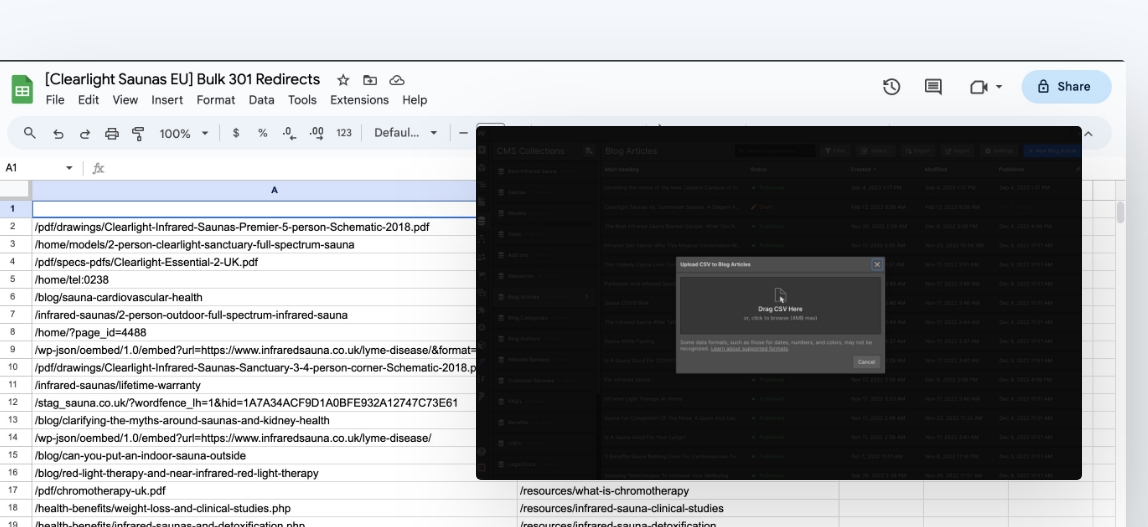
Setting up 301 redirects is a critical step during the migration process, as it ensures that users and search engines can find your content after the migration is complete. A 301 redirect is a permanent redirection from one URL to another, preserving search engine rankings and user access when a webpage’s URL has changed.
To configure 301 redirects, you’ll need to access your website’s .htaccess file and include the necessary redirect code.
Customizing Your Webflow Site
.jpeg)
After migrating your content and setting up 301 redirects, it’s time to customize your Webflow site to match your brand identity and design preferences. Let’s delve into how you can select and customize templates, and incorporate plugins and extensions to enhance the functionality of your Webflow site, mirroring what you had on your WordPress site.
Selecting and Customizing Templates

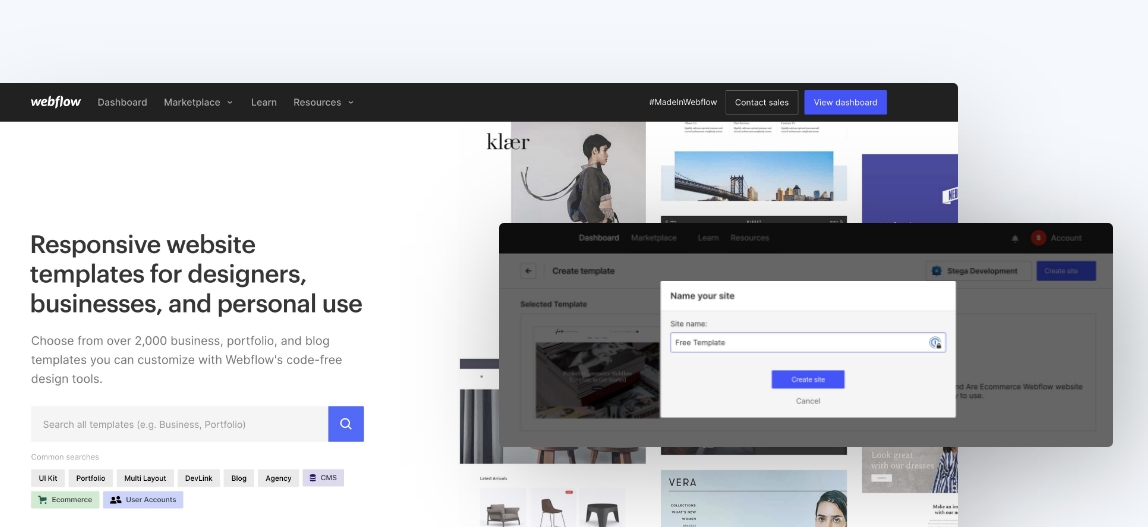
Webflow offers a wide variety of templates to choose from, which can be customized to match your brand and design preferences. Browse through Webflow’s template library to find one that suits your needs, and use the Webflow Designer to tweak the design elements, such as colors, fonts, and layouts.
With Webflow’s powerful visual builder, you can create a unique and professional-looking website that reflects your brand identity and vision.
Integrating Plugins and Extensions
While Webflow does not offer official plugins like WordPress, you can still integrate plugins and extensions to add functionality to your Webflow site. Many popular WordPress plugins, such as contact forms, ecommerce solutions, and analytics tools, have equivalent solutions available for Webflow.
To integrate these plugins and extensions, you can either use Webflow’s built-in integrations library or add custom code to your site. This process allows you to recreate the functionality you had on your WordPress site and ensure that your new Webflow site meets all of your needs.
Migrating Your Domain and Launching Your Webflow Site
With your content transferred and your Webflow site customized, it’s time to set up your custom domain and launch your new website.
Next, we’ll navigate through the process of updating DNS settings with your domain provider and launching your Webflow site.
Update DNS Settings

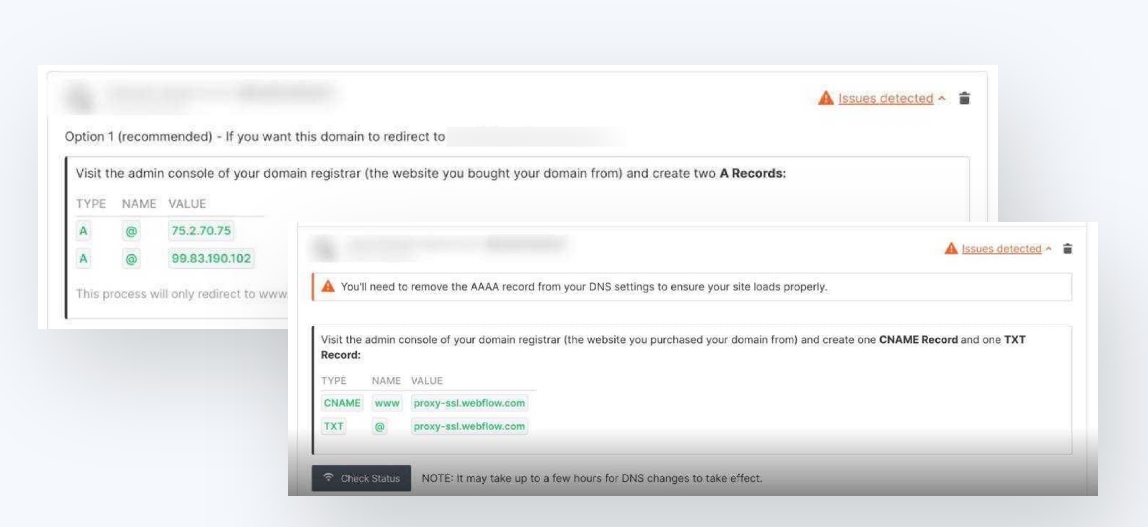
To migrate your domain to Webflow, you’ll need to update your DNS settings with your domain provider. This process involves changing the A record and CNAME record for your domain to point to your Webflow site.
Once you’ve updated your DNS settings, it may take up to 48 hours for the changes to propagate across the internet. During this time, your website may be temporarily unavailable, so it’s important to plan your migration during a period of low traffic.
Launch Your Webflow Site
.jpeg)
Once your DNS settings have been updated and your domain has propagated, it’s time to launch your Webflow site. In the Webflow dashboard, click the “Publish” button to make your site live and accessible to the public.
Following the site launch, make sure to test its functionality across diverse devices and browsers to ensure optimal performance. This includes checking for broken links, image display issues, and any other potential problems that may affect the user experience.
Post-Migration Optimization

After successfully migrating your WordPress site to Webflow, it’s important to focus on post-migration optimization. Let’s delve into how you can monitor your website’s analytics and implement SEO best practices to enhance your Webflow site’s search engine ranking.
Analytics are a great way to track the performance of your website. You can use tools
Monitor Analytics
.jpeg)
Keeping a close eye on your website’s analytics is key to identifying potential improvements and monitoring growth post-migration. Use tools like Google Analytics, Google Search Console, and other third-party analytics platforms to gather data on your website’s performance, including traffic, user engagement, and SEO performance.
Analyzing this data will help you make informed decisions on how to optimize your Webflow site and ensure that it continues to grow and succeed.
Implement SEO Best Practices
Implementing SEO best practices is essential for your Webflow site to achieve high rankings in search engine results. This includes selecting appropriate keywords, optimizing page titles and descriptions, and utilizing internal links to optimize SEO.
Additionally, make sure to optimize images on your website by using descriptive file names, compressing images, and utilizing the appropriate image format. By following these SEO best practices, you’ll help your Webflow site rank higher in search engine results and attract more organic traffic.
Final thoughts
Migrating your WordPress site to Webflow can be a game-changer for your online presence. With its design flexibility, ease of use, built-in SEO tools, and zero maintenance requirements, Webflow offers a powerful and user-friendly platform for building and managing your website. By following the steps outlined in this guide, you’ll be well on your way to a successful migration and a thriving Webflow site. So, what are you waiting for? Make the switch to Webflow today and experience the difference for yourself.
Frequently asked questions
Why I switched from WordPress to Webflow?
After taking into account the powerful features and time-saving capabilities that Webflow offers web designers, I decided to switch from WordPress to Webflow.
Is Webflow better than WordPress for designers?
Webflow offers a visual interface for design customization without coding, making it an easier option for designers. However, WordPress provides more depth for customizing functionality, requiring some knowledge of coding.
How do I transfer my content from WordPress to Webflow?
To transfer your content from WordPress to Webflow, you'll need to export posts and pages from your WordPress website, and then import content into Webflow CMS with mapping of fields and images.
Does Webflow work with WordPress?
Yes, Webflow does work with WordPress. You can use the WordPress plugin to build your site visually in Webflow and serve one or more of those pages directly on your WordPress site for complete design control without code.
Can I customize my Webflow site to match my brand and design preferences?
Yes, you can customize your Webflow site to match your brand and design preferences using the wide variety of templates and the powerful visual builder.
